A couple months ago I decided to start sorting through all of the stuff in our garage, which is not a small task because it hasn’t been properly sorted through since 2009 and there are boxes in there full of things going back to the 80s and beyond. I think I’m pretty good at identifying which items will be valued by collectors (you might be surprised at how valuable some tiny little pieces of plastic can be) so I put those things in a box to clean and sell. There’s also a lot of stuff which isn’t really worth the effort of selling and to be completely honest, that’s the stuff I’m excited about because I’ve wanted to make something like this for so long and my conscience won’t allow me to make art out of, say, Princess Starbust’s magic wand when there’s a My Little Pony collector out there who needs it to complete the set!
I watched a lot of Muck n Brass videos to learn how she puts her toy collages together – her work is really inspiring to me because I admire how she’s saving plastic from going to landfill as well as making really fun, colourful art. It’s definitely more complicated than it looks!
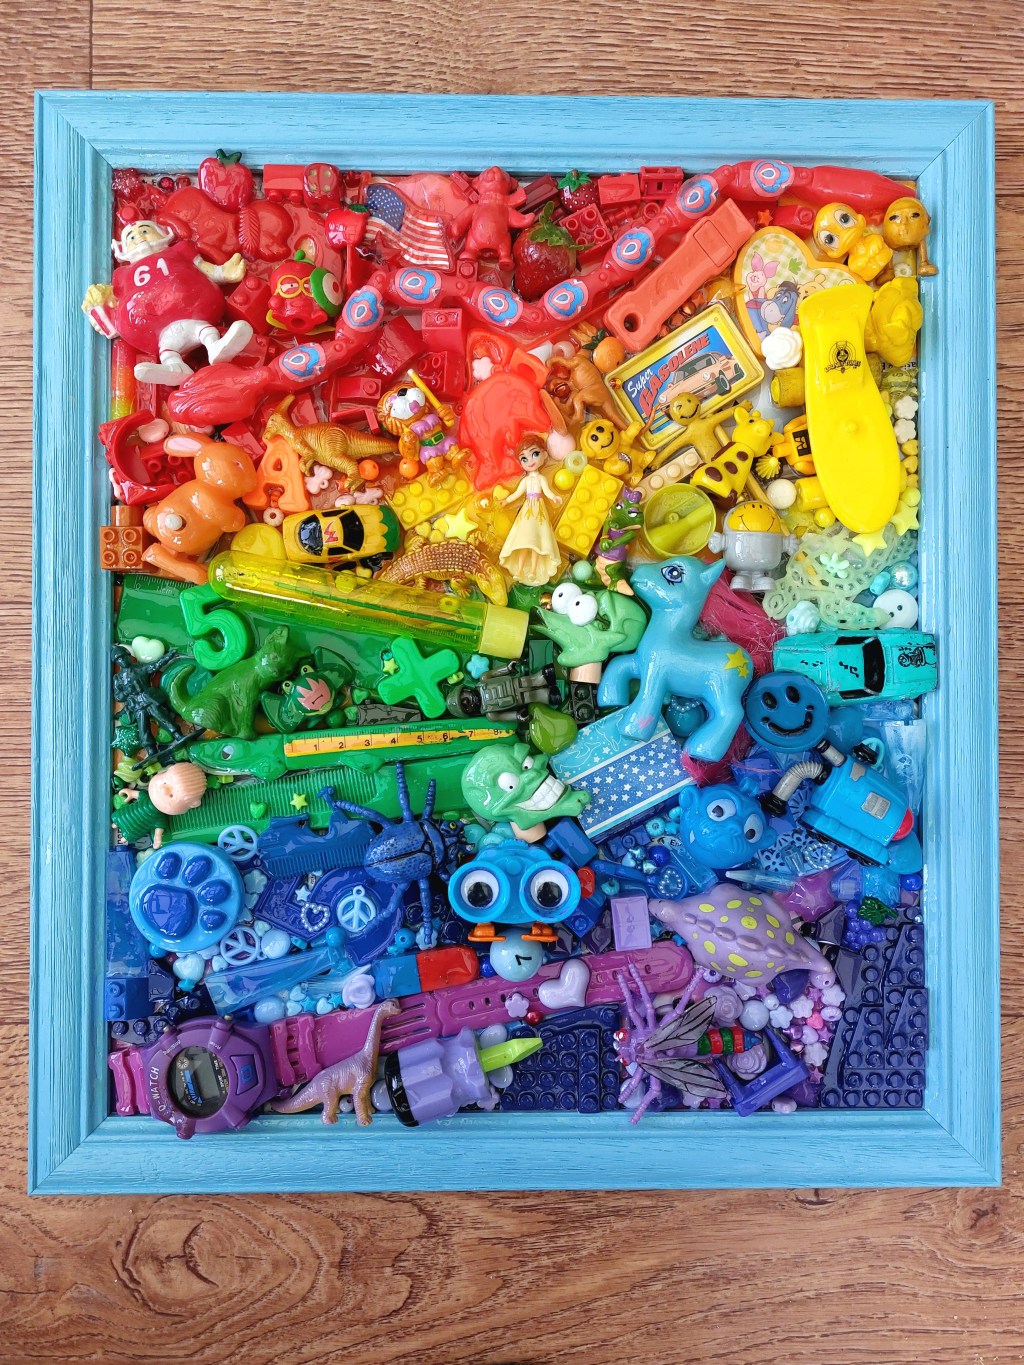
To make my collage, I started with a thrifted picture frame that I had already painted blue. Then I removed the glass and duct taped over the back panel so that resin wouldn’t seep out through the gaps. The brown back of the frame wouldn’t match the colourful toys if there were any gaps between toys so to start with I glued down a bunch of Pokémon energy cards (the ones that are so worthless some people bin them right after opening the pack). Then I placed the larger pieces and tried to group them together by colour so I have kind of a rainbow look. I gradually added more until I ran out of toys and then I filled the remaining space with beads and buttons. Finally, I poured resin all over it and left to cure. I was very nervous that it wouldn’t cure properly or that I hadn’t used enough to hold everything in place but to my delight only one tiny star bead fell off when I picked the frame up!
Here’s the finished piece:

I’m really happy with how this turned out for a first attempt and I’m looking forward to making more!


Leave a comment